Keep your pictures in the image library
Upload pictures, generate new ones with AI, and sort them into categories so they are ready to use on your websites and forms.
You’ll need: Team members need the Conversational Forms permission. Generating an image needs 75 credits.
The image library holds every picture on your account: the ones you upload and the ones generated with AI. When you add an image to a website, it comes from here, so you can upload or generate it once and reuse it.
AppsImages library
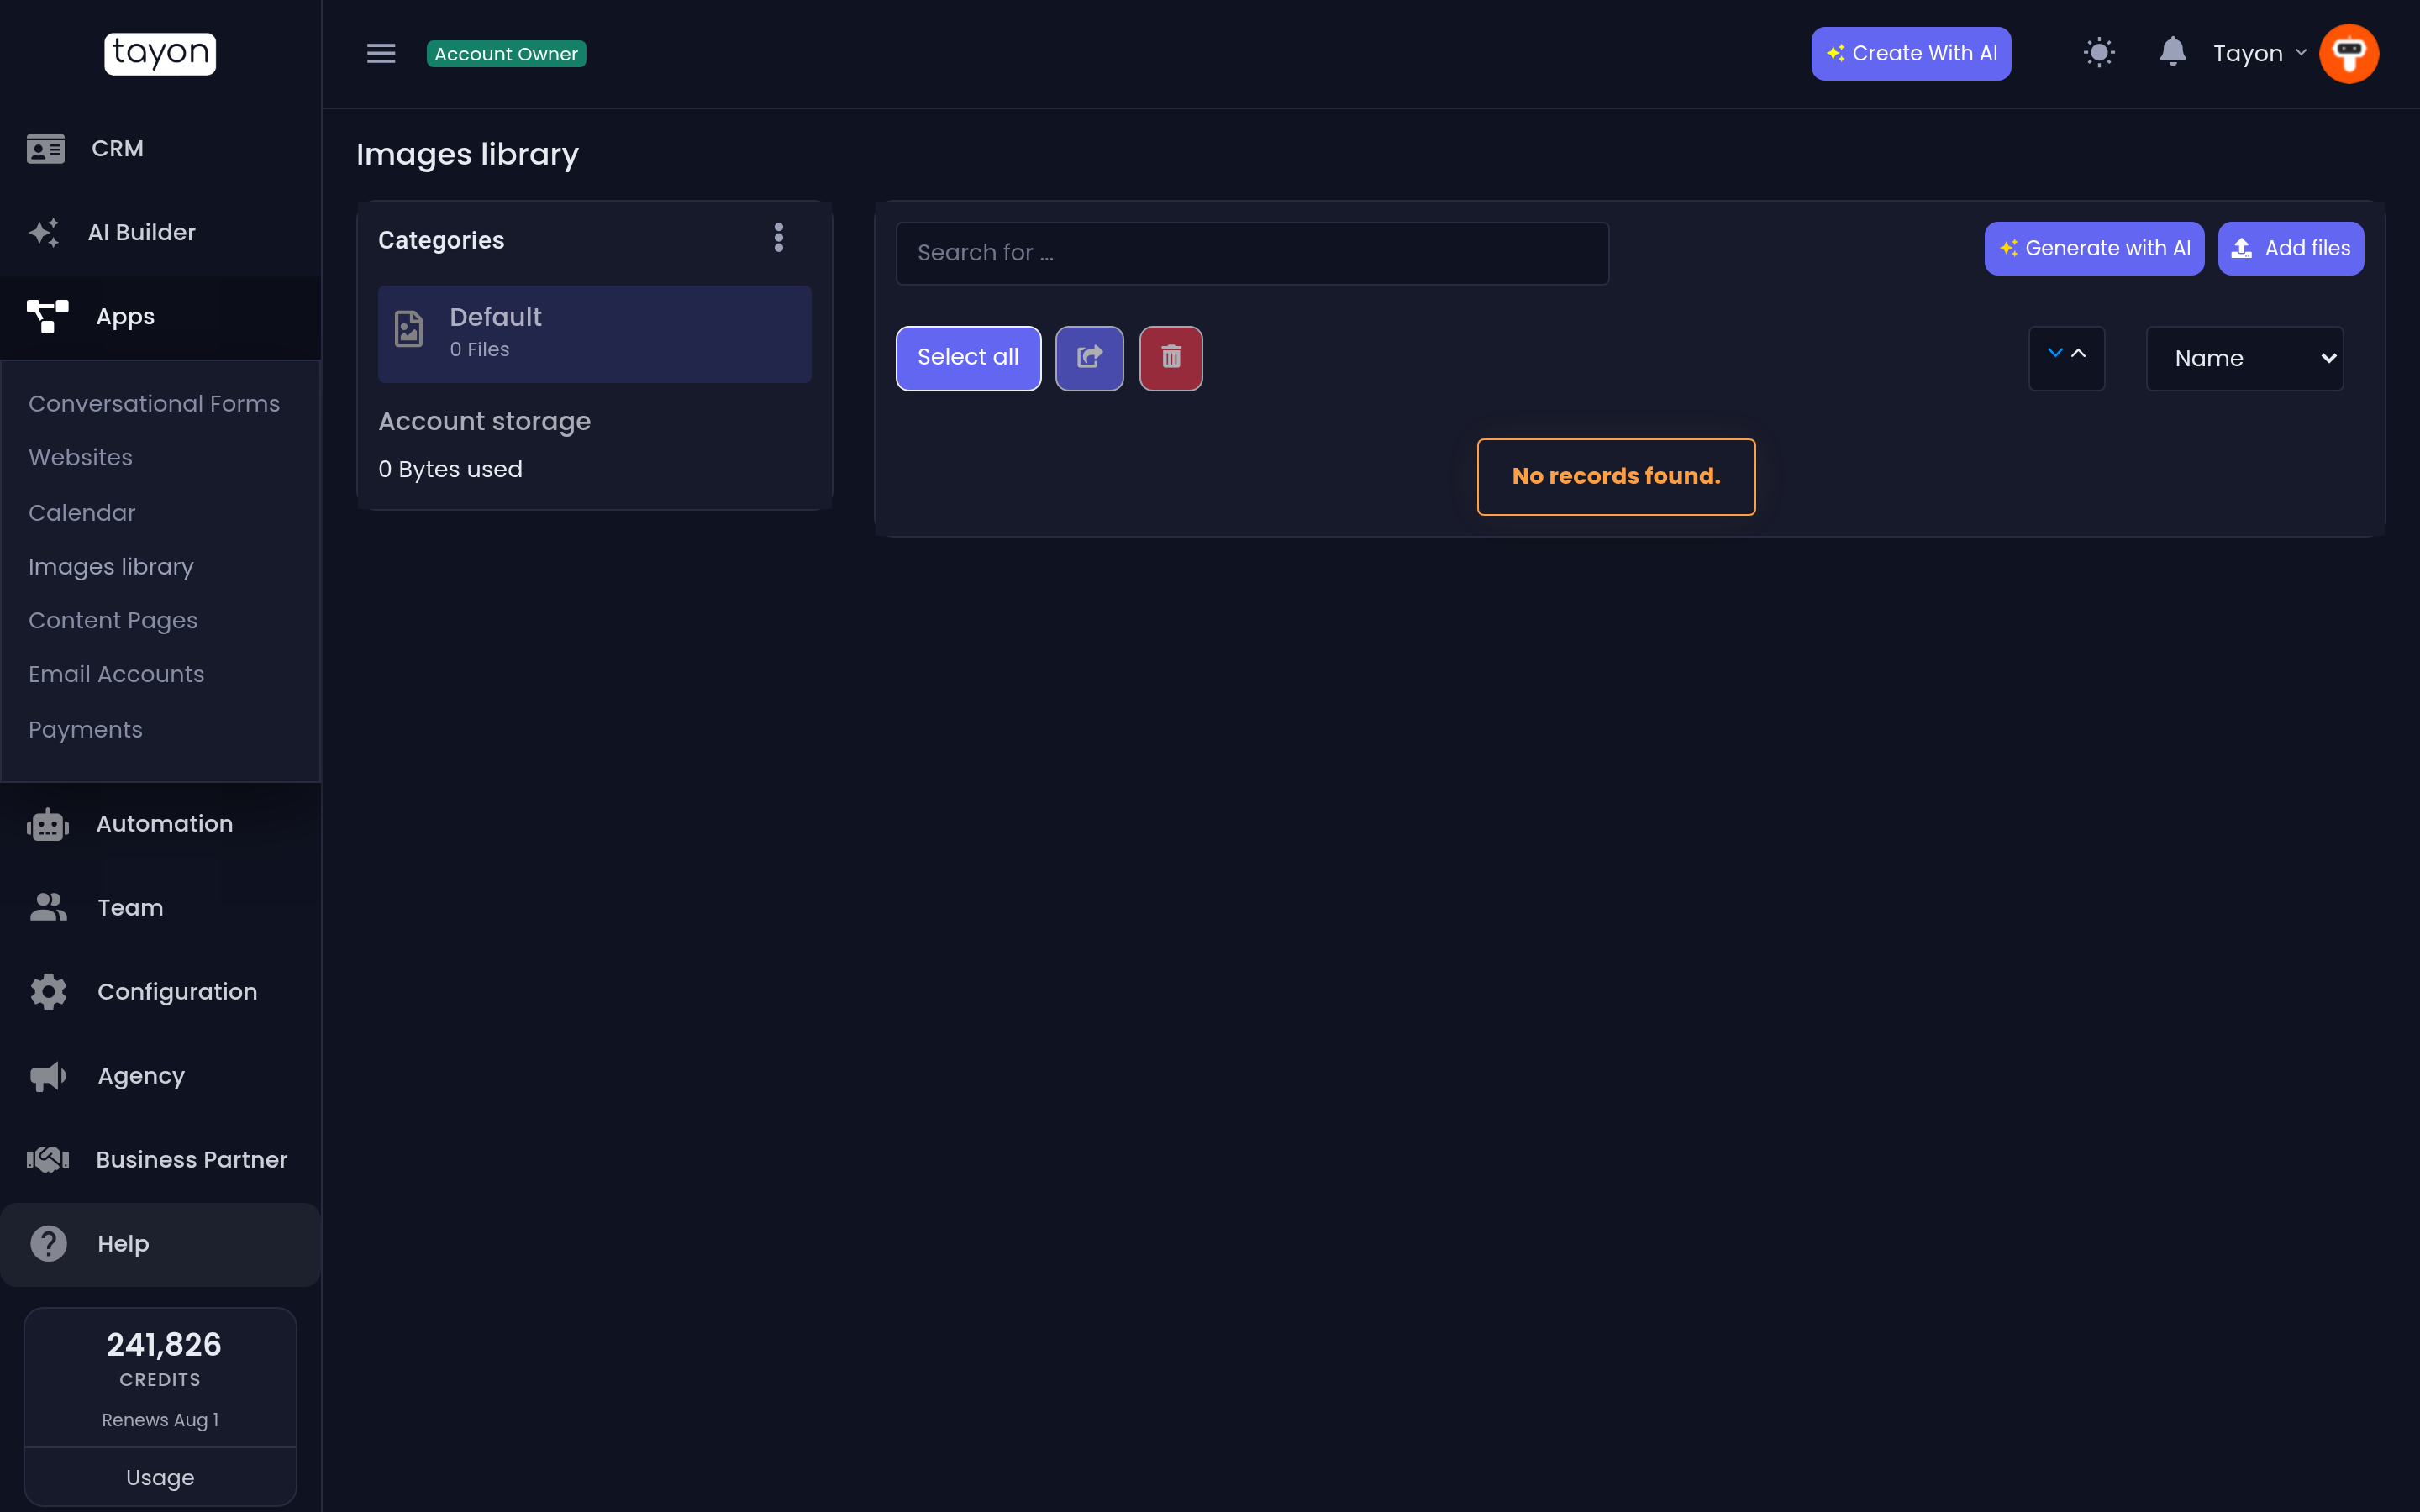
#Find your way around
- Categories, on the left, are folders for your images, with a count of Files in each. Empty categories are greyed out until something is added to them.
- Account storage, under the categories, shows how much space your images take up.
- The main area shows the images in the selected category. Use Search for … to find one by name. Use Order by to sort by Name, Date or Size, and select it again to reverse the order.
AI Builder projects put their pictures in their own categories, such as AI - Websites and AI - Conversational Forms. Look there for images the AI Builder made for you.
#Upload pictures
- Select the category the pictures belong in.
- Choose Add files.
- Check the Category, then drag your pictures in or browse for them.
- Choose Add file to save them to the library.
| Limit | |
|---|---|
| File types | Images only |
| Size | Up to 1 MB per image |
| Per upload | Up to 25 images |
The uploader can rotate a picture before you save it. If a photo is over 1 MB, resize or compress it on your computer first.
#Generate an image with AI
- Select the category the new image should go in.
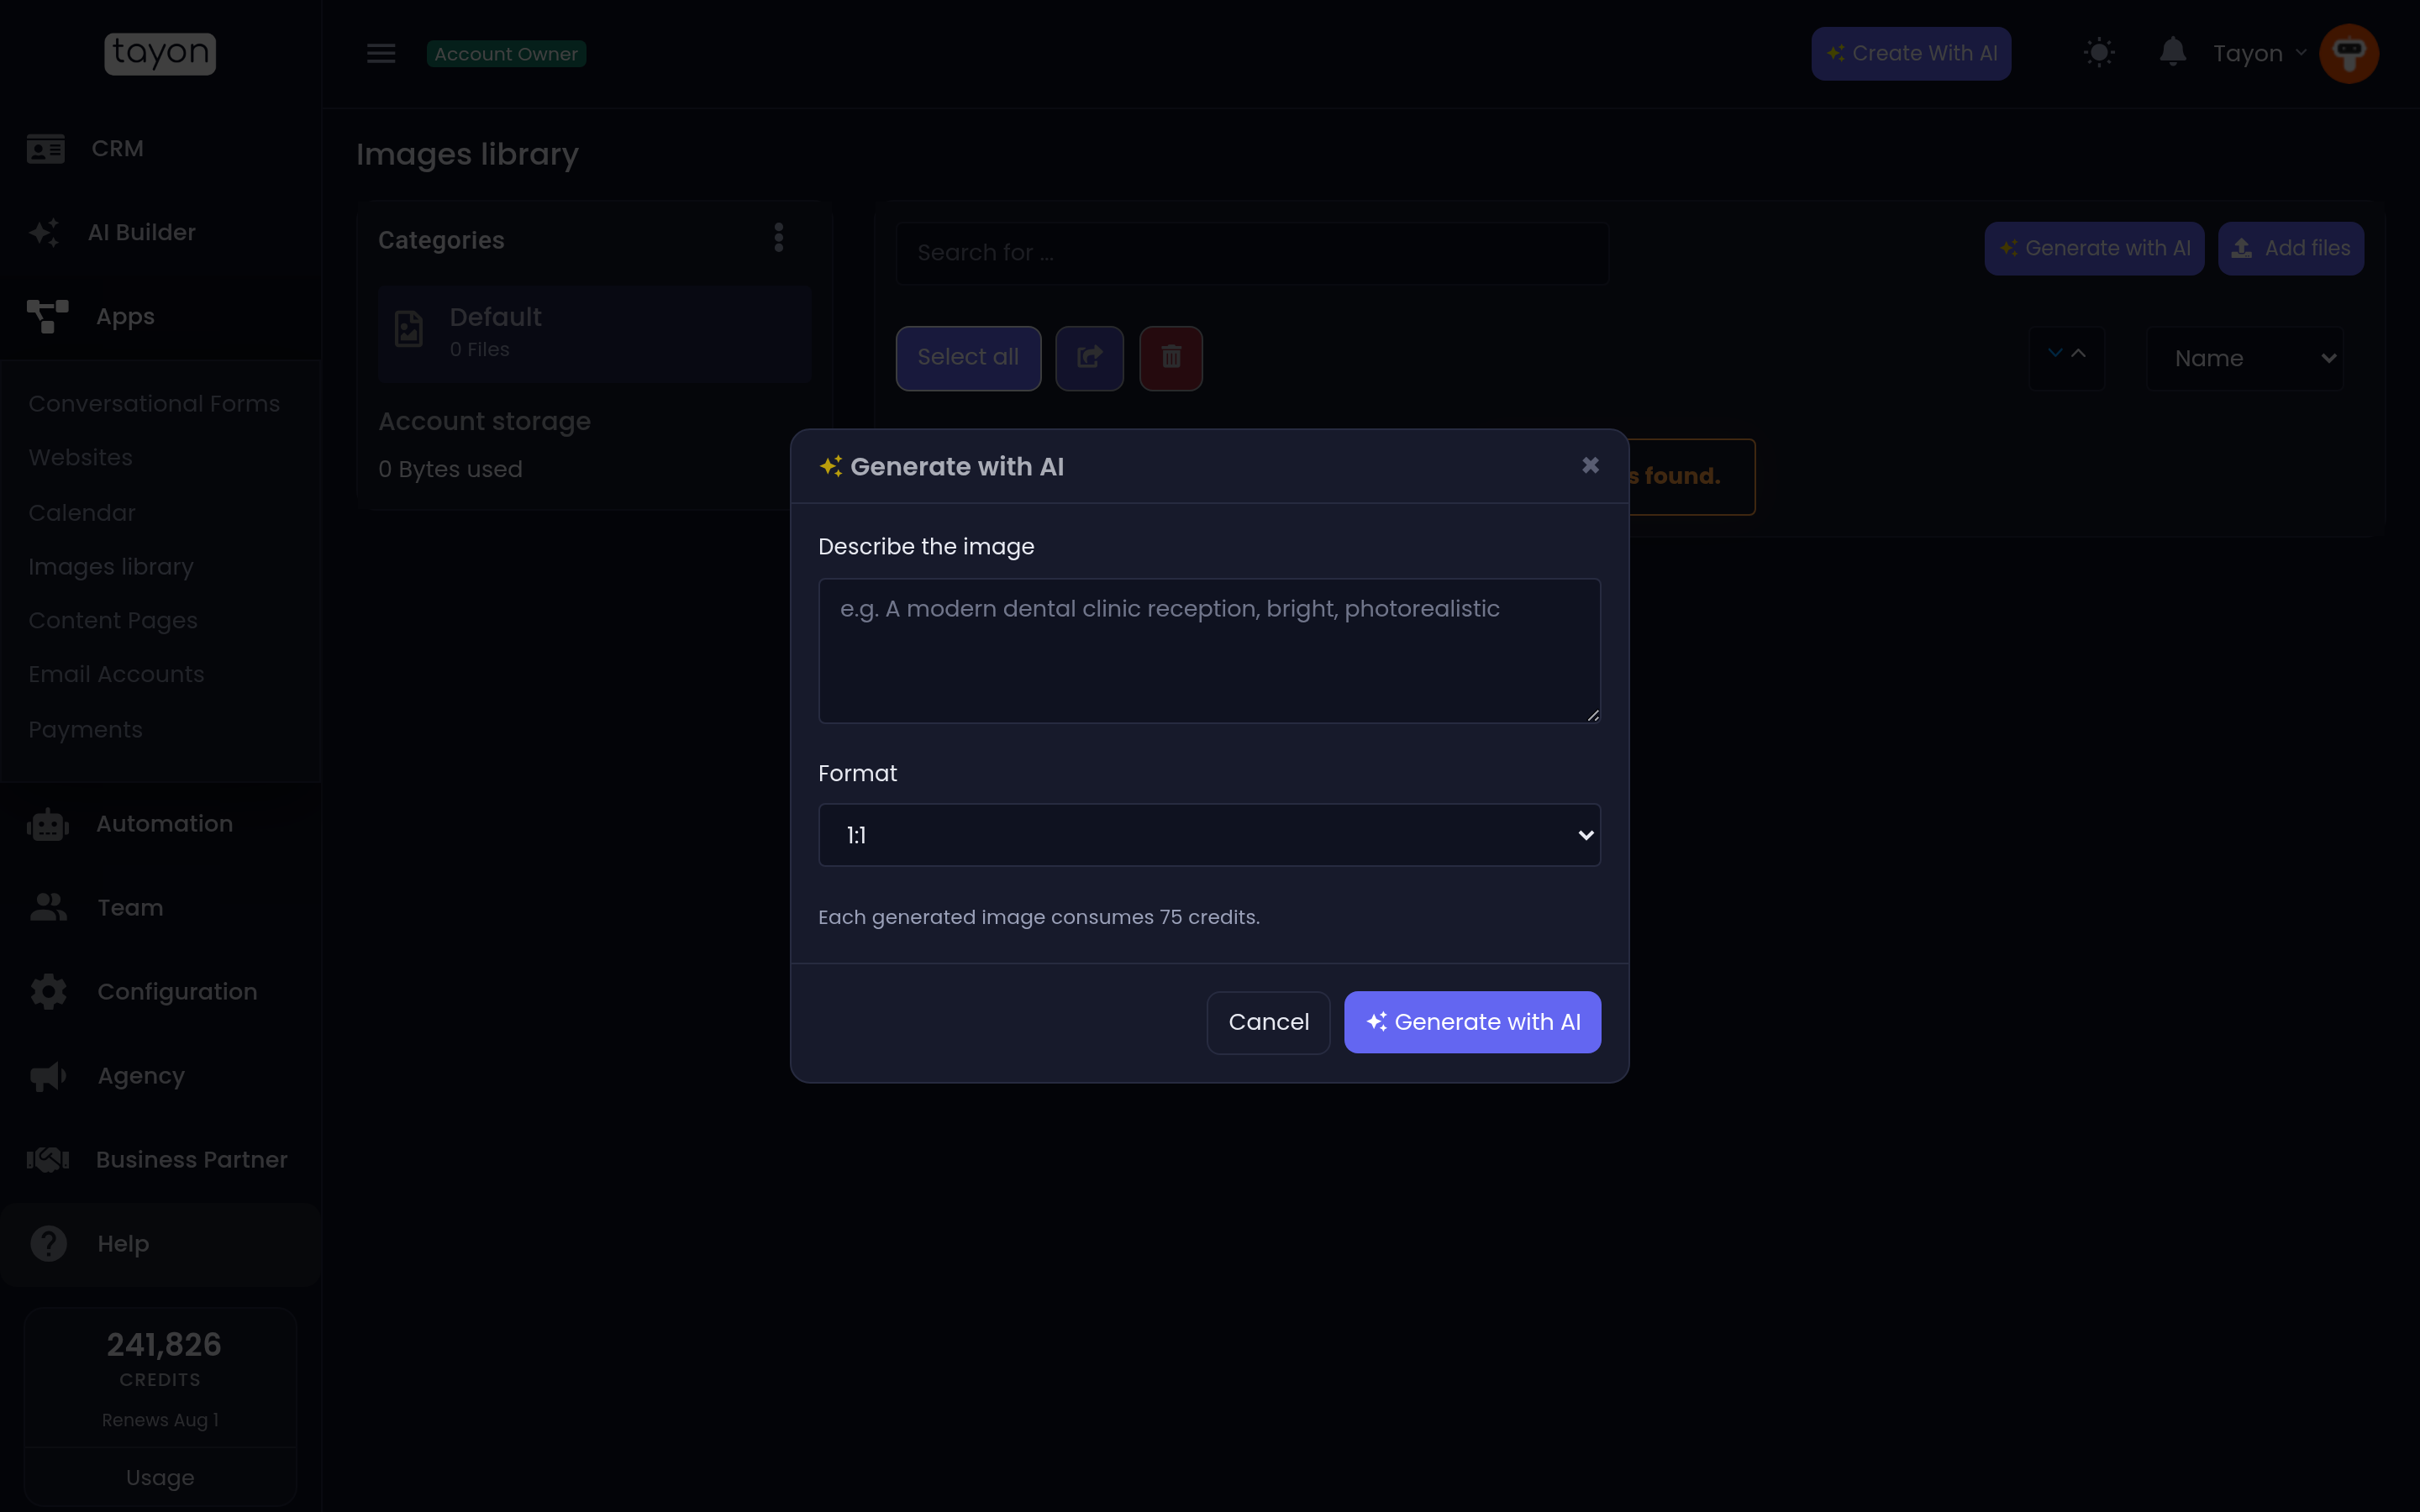
- Choose Generate with AI.
- Under Describe the image, write what you want to see. Be specific, for example A modern dental clinic reception, bright, photorealistic.
- Pick a Format: 1:1 (square), 16:9 (wide), 9:16 (tall, for phones), 4:3 or 3:4.
- Choose Generate with AI.
A banner says Generating your image — it will appear in the library shortly…. You can keep working. Generation usually takes under a minute. When it is done you see Your AI image is ready! and the image is in the category you selected. If it fails, you see The image could not be generated. No worries — try again.
#Organise your images
- Rename an image by editing its title on its card.
- Move or delete several at once: tick the images, or use Select all. Then open With selected items and choose to move them to another category or delete them. To move them, pick the destination under Choose a category to move and choose Move.
- Manage categories: open the ⋮ menu above the categories and choose Manage categories to add, rename or delete one.
A category that still has images in it cannot be deleted. Move or delete its images first. Your last remaining category cannot be deleted either.
#Use your images
When you edit a website, choose 🖼 My images on any picture to pick from this library. Picking an existing image costs nothing. See Edit your website by clicking it.
Updated: