Set up email on your own domain
Create a real mailbox at your own address, add the four DNS records that let it send, and know which sending limit applies where.
You’ll need: Account owner access. The free plan includes one mailbox; paid plans include more.
A mailbox at your own domain — you@yourbusiness.com — hosted here, sending and
receiving like any other email account. You can read it in a browser, add it to
Outlook or Apple Mail, and let Tayon send from it.
AppsEmail Accounts
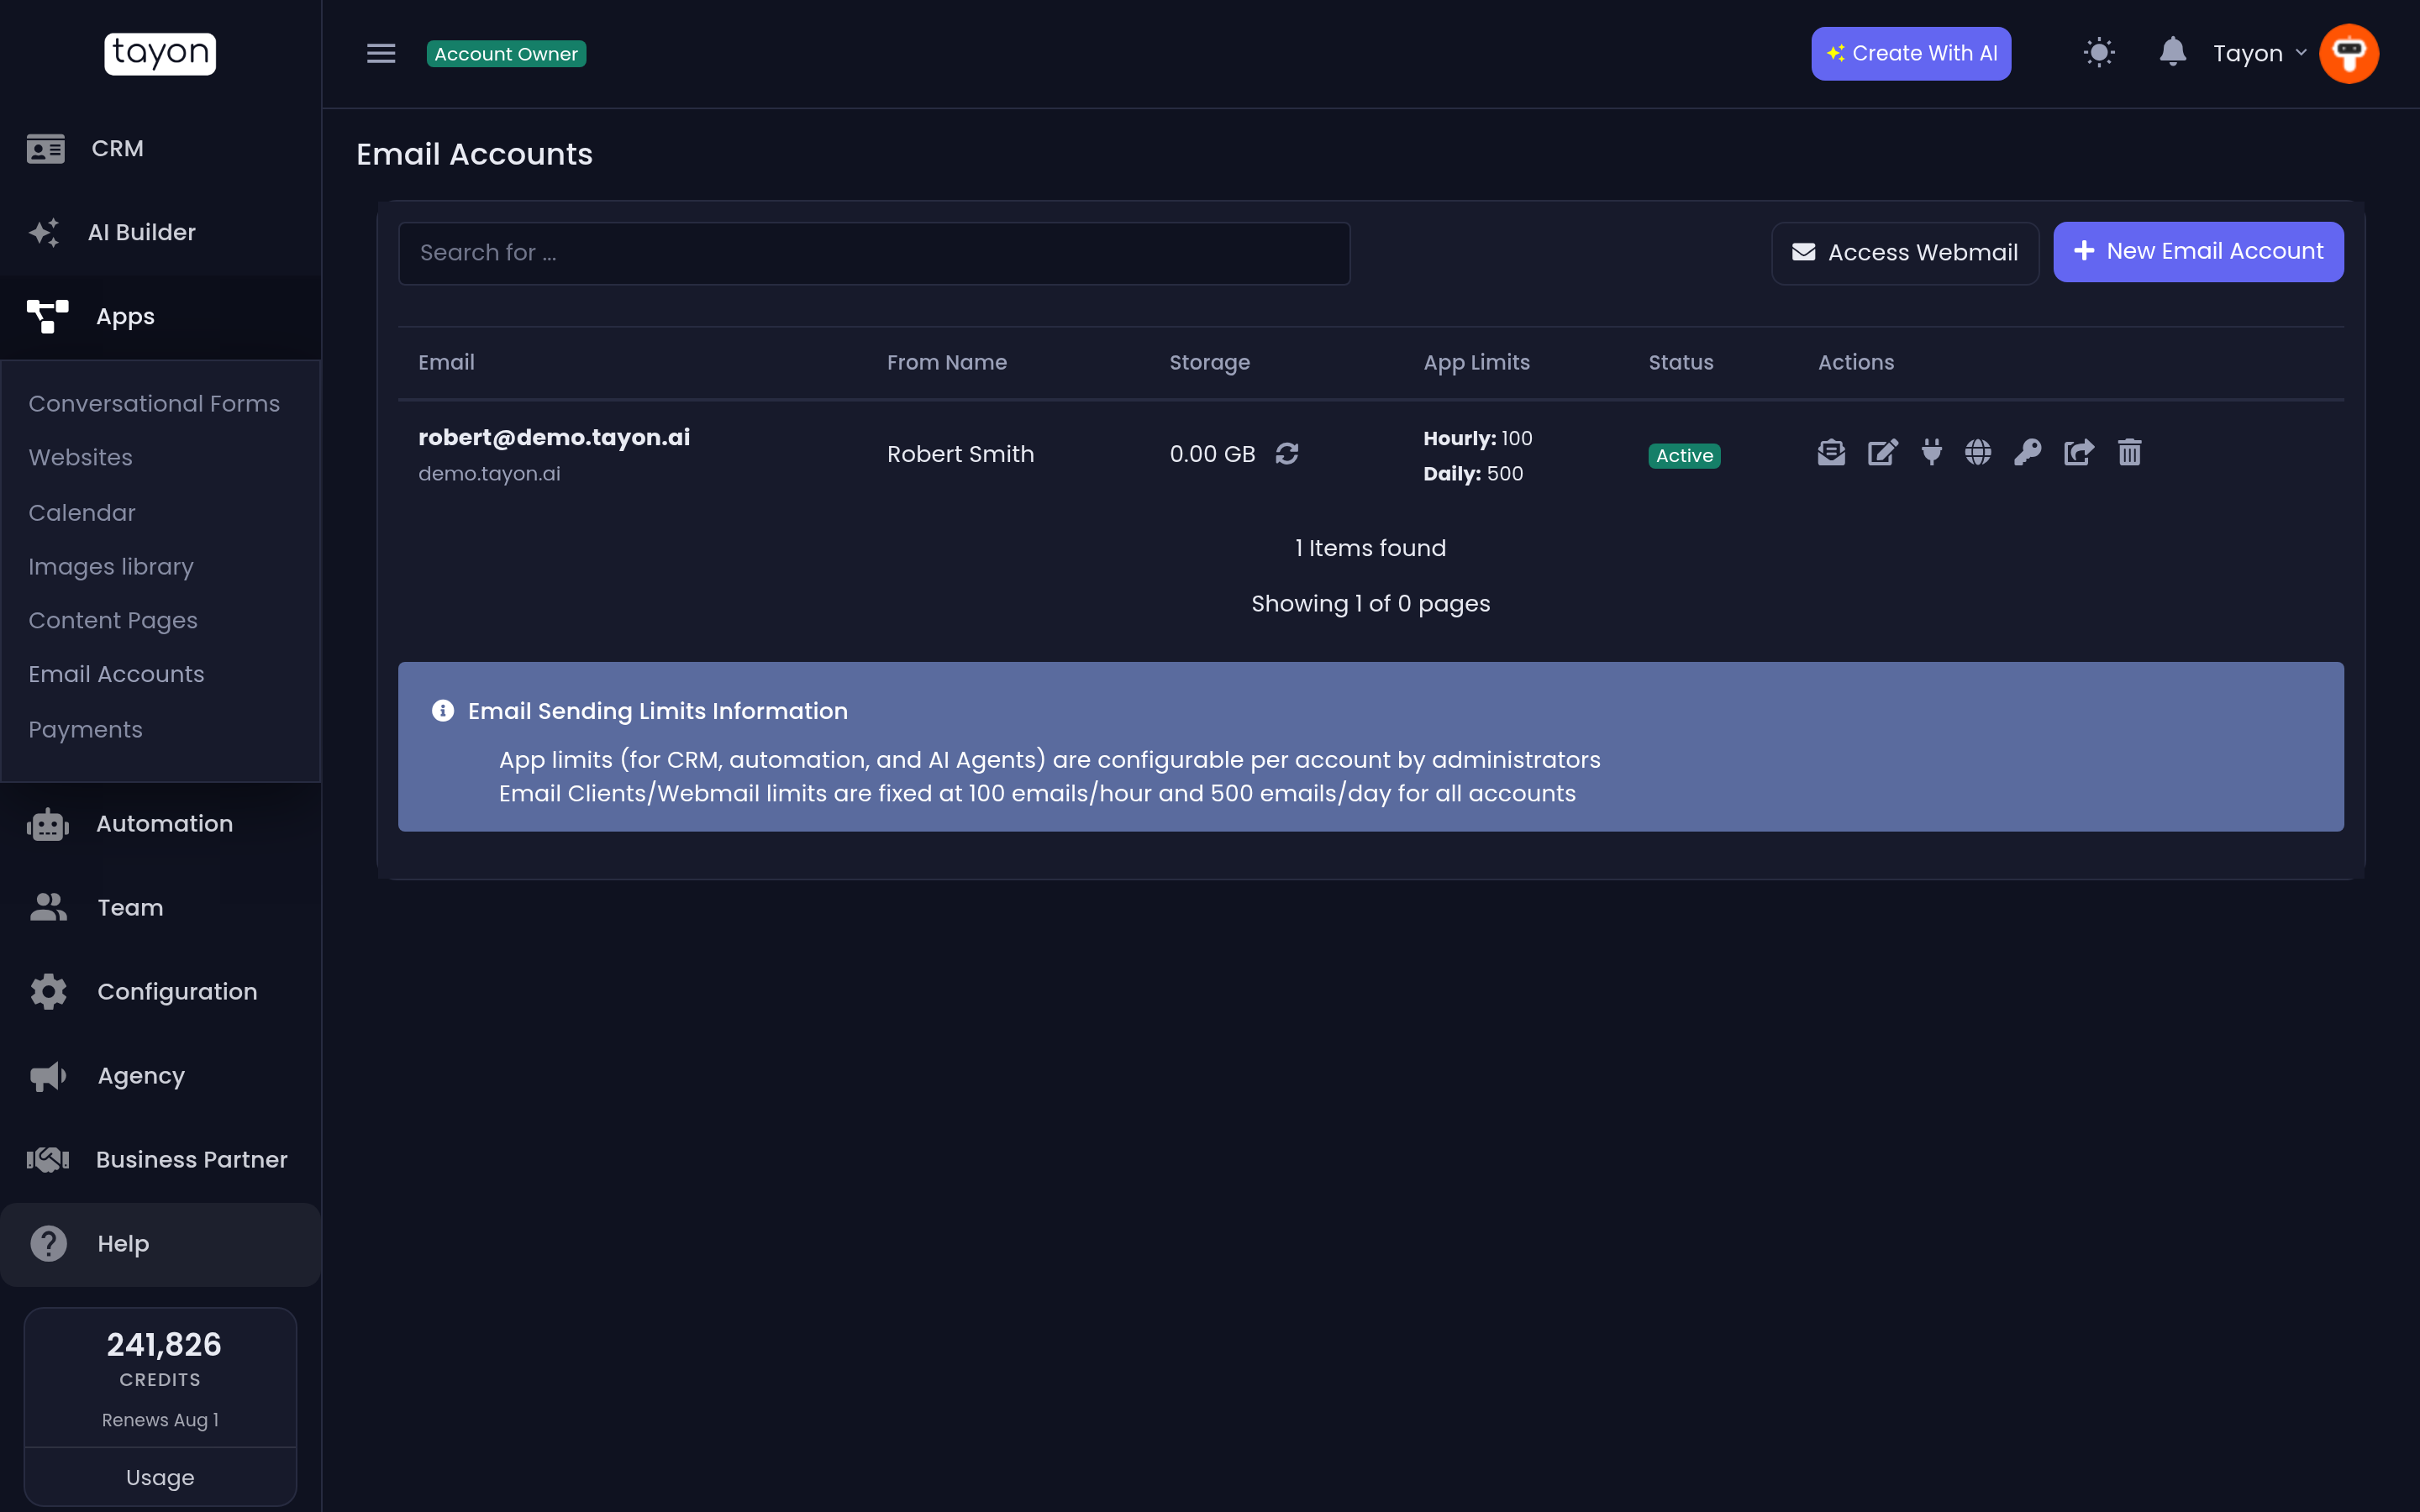
The screen lists every mailbox on your account with its From Name, Storage, App Limits, Status and Actions.
#Create the mailbox
- Choose New Email Account.
- In Email Address, type the full address you want — Enter the full email address (e.g., user@yourdomain.com).
- In From Name, type the name recipients should see, such as your business name.
- Set a Password and repeat it in Confirm Password.
- Choose Create Account.
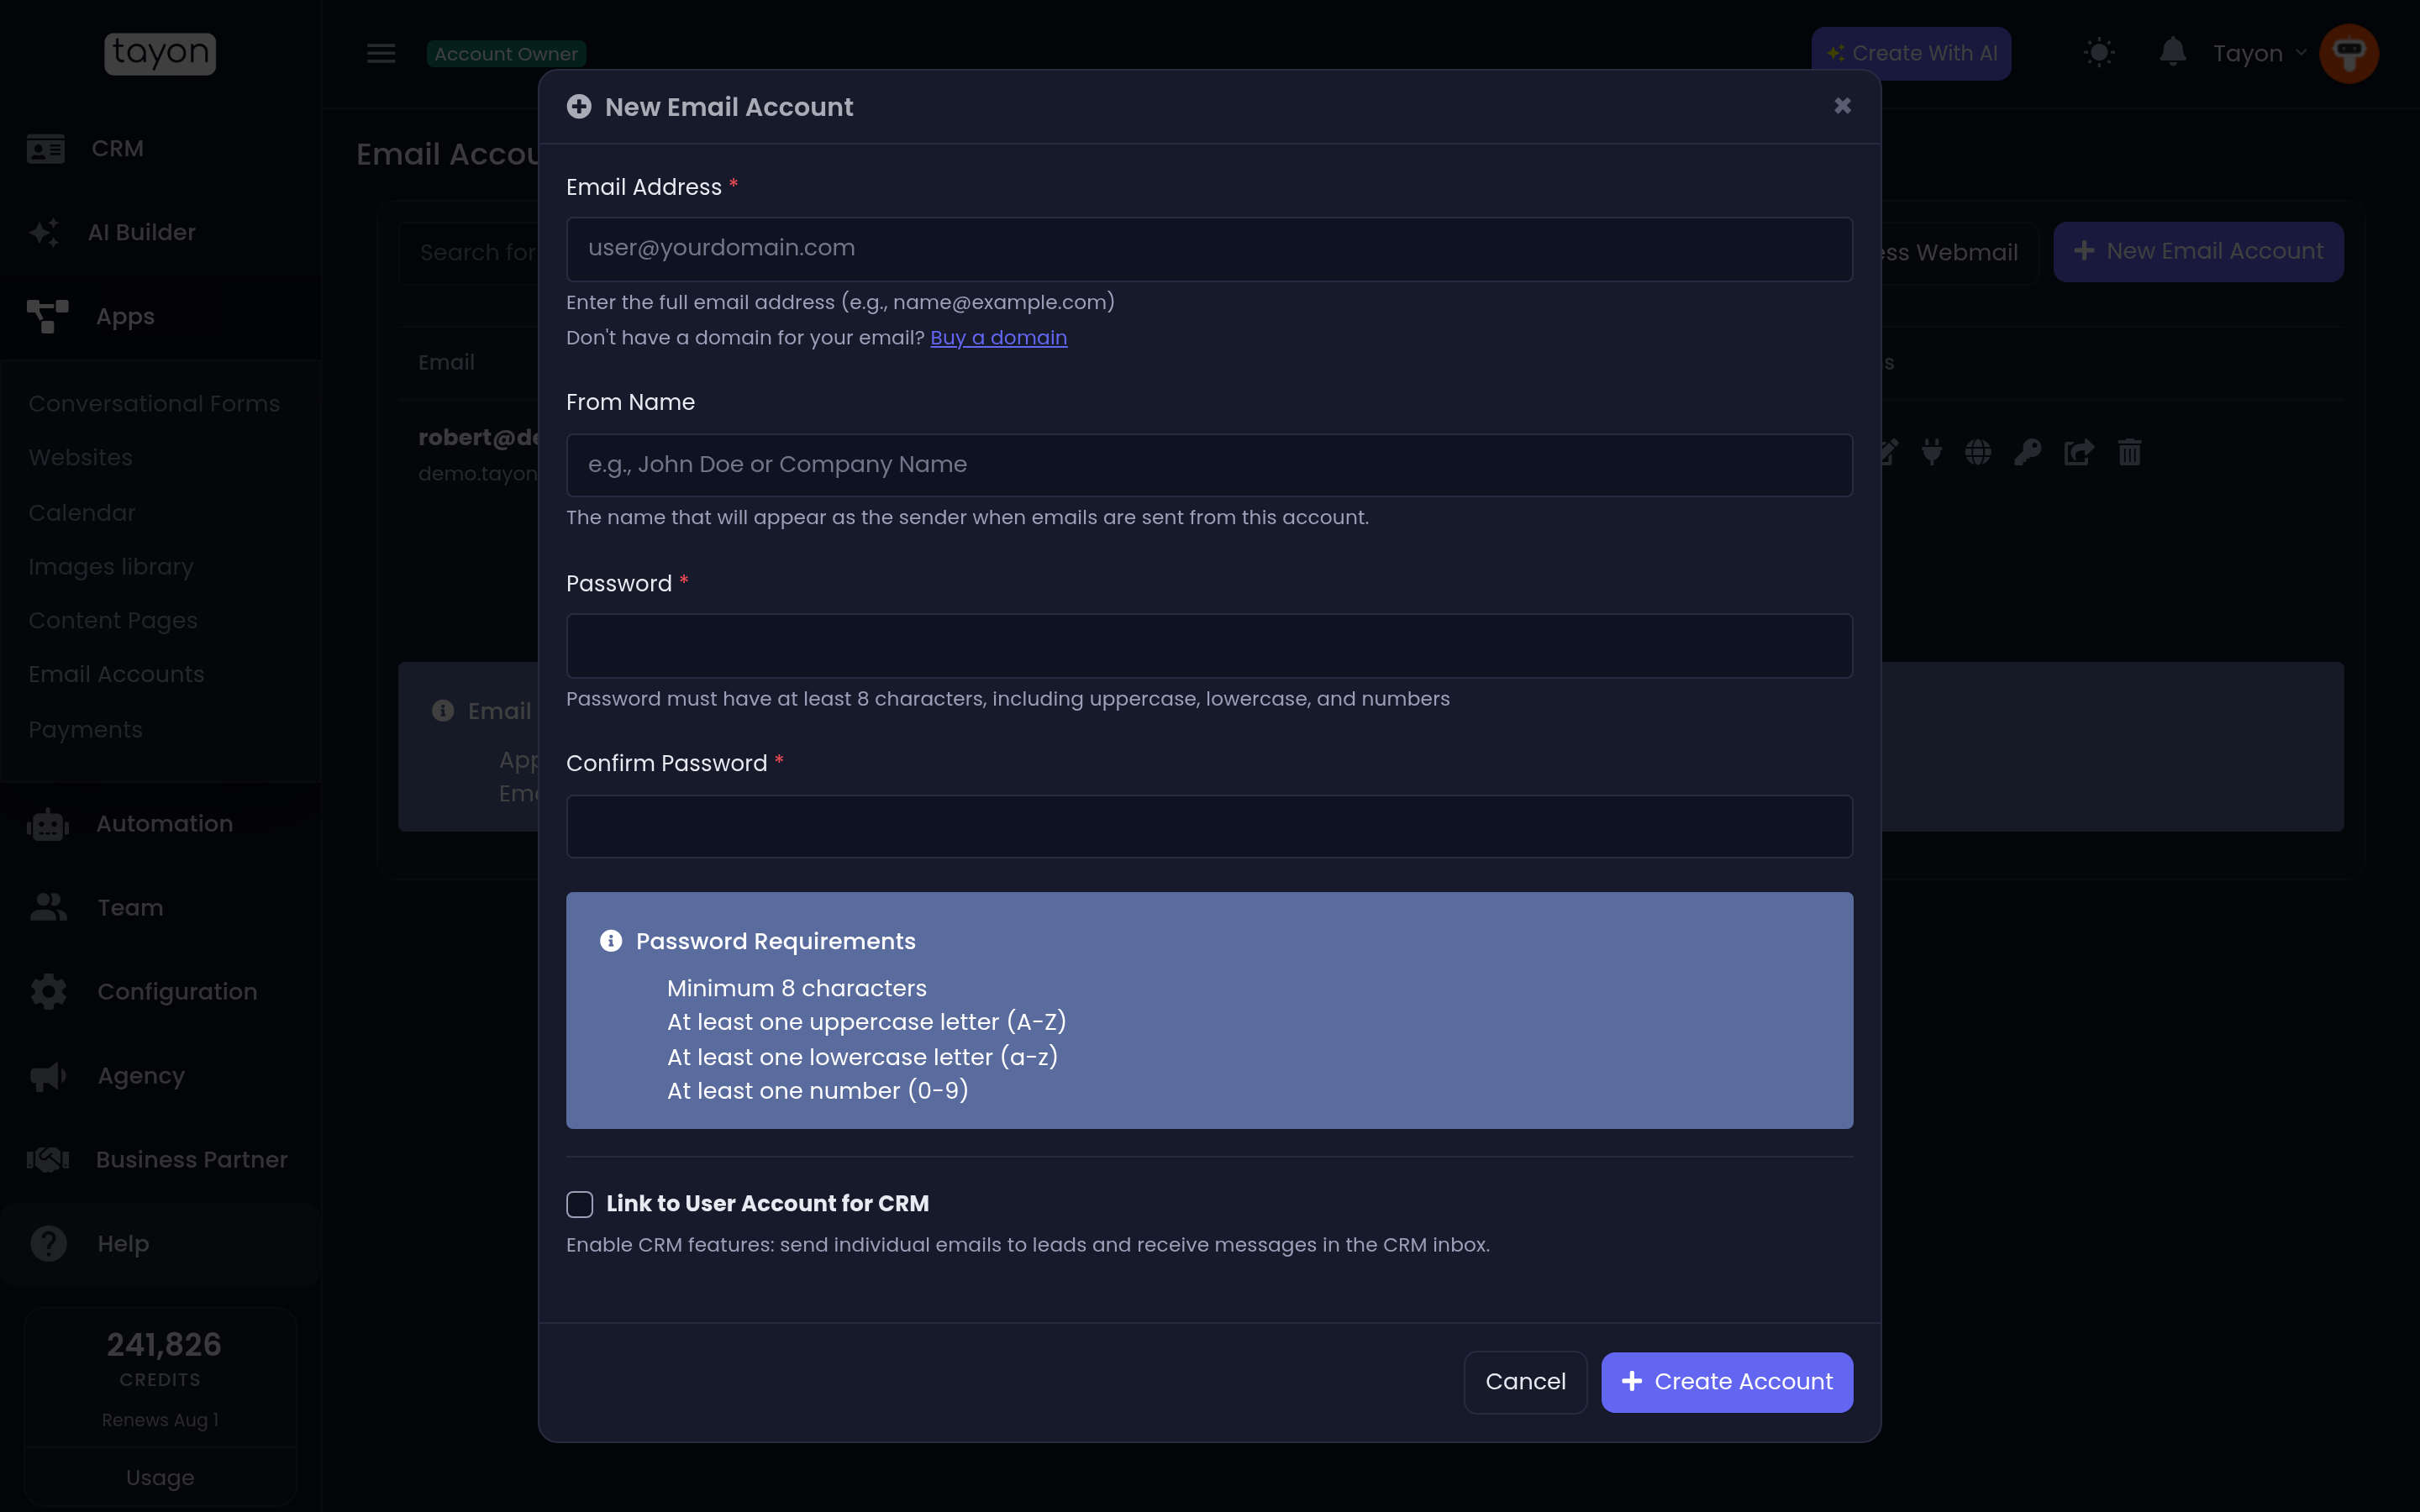
The password must meet all four rules under Password Requirements: at least 8 characters, one uppercase letter, one lowercase letter and one number.
Link to User Account for CRM connects the mailbox to a person on your team so Tayon can send individual emails to leads and receive messages in the CRM inbox. Leave it off and the mailbox still works as normal email; turn it on and replies show up in the Messenger. Choose Main Account or pick someone from Select User Account.
#Add the DNS records
A new mailbox exists straight away, but other mail servers will not trust it until you prove you own the domain. That takes four DNS records.
#If your domain is on Tayon
If you bought the domain on Tayon, or connected it under Domains in the main menu, there is nothing to copy. The New Email Account dialog says Use an address on yourdomain.com and we set up its email records automatically: Tayon writes all four records and switches the mailbox on once they are live. To look at them, see Manage your DNS records.
#If your domain is managed somewhere else
Add the records yourself at whoever manages your domain’s DNS.
- Find the mailbox in the list and open DNS Settings (the globe icon).
- Copy each record in turn and add it at your DNS provider.
- Save the changes there, then come back and choose Verify DKIM.
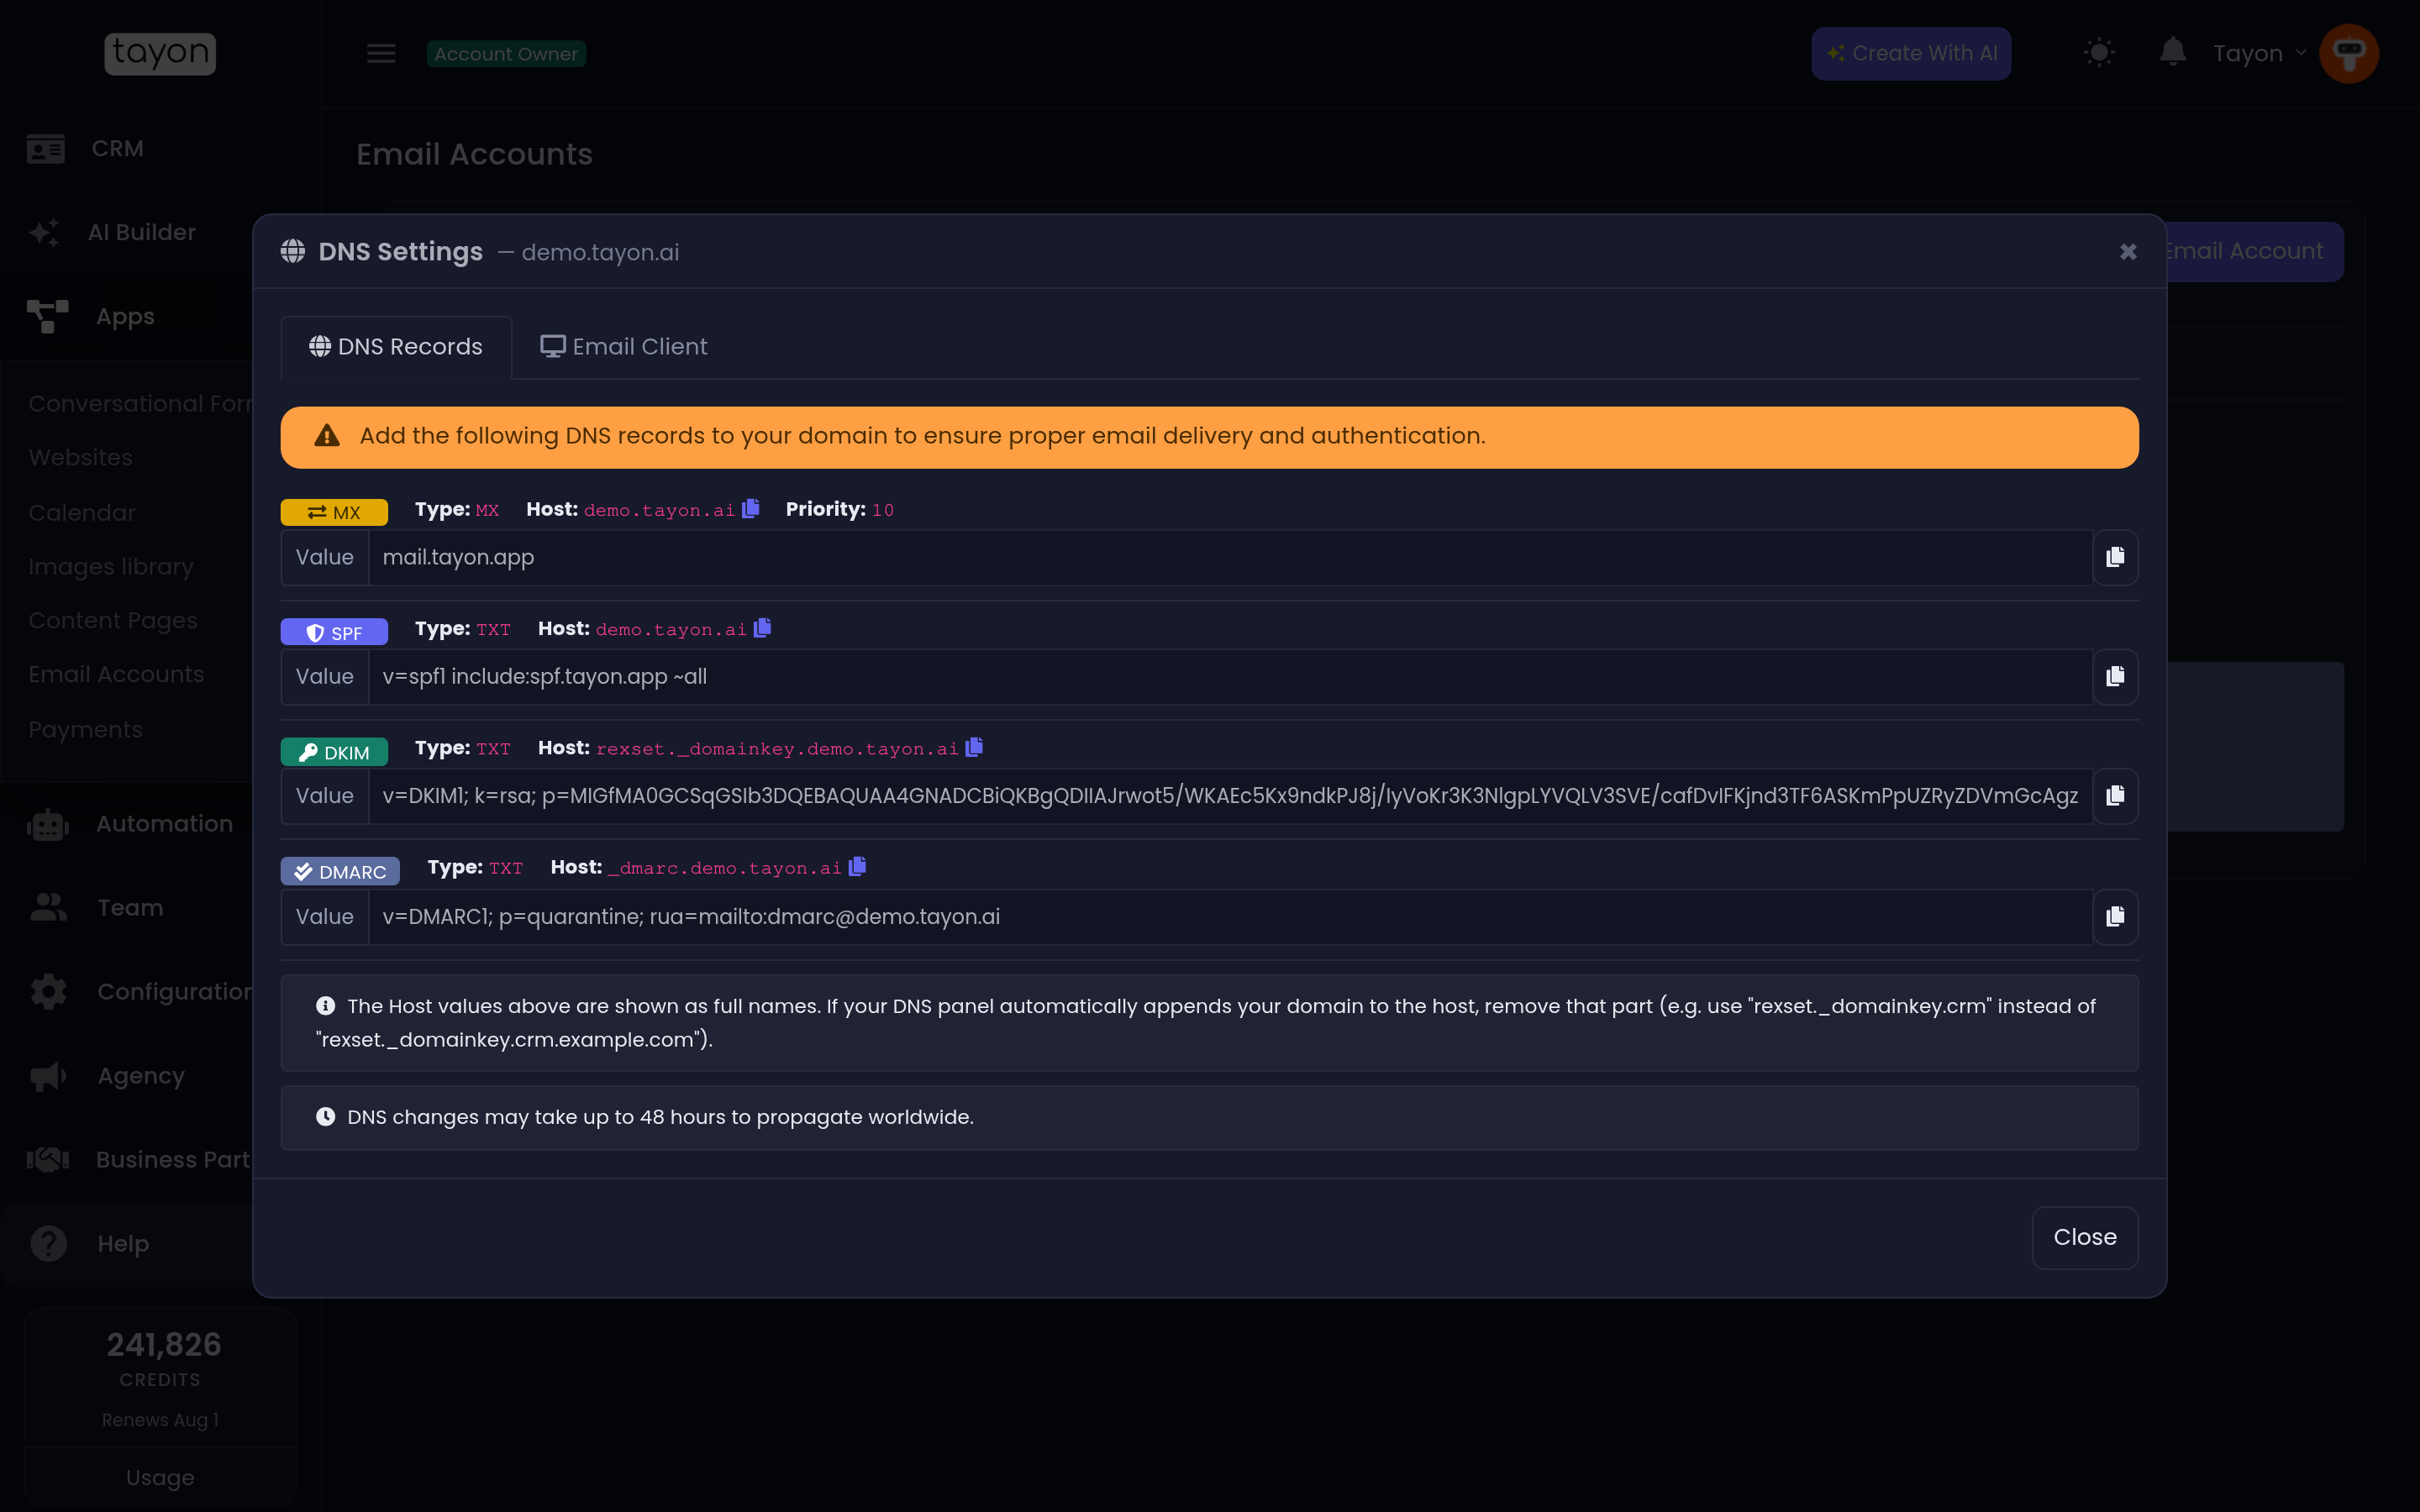
The DNS Records tab shows all four:
| Type | Host | Value |
|---|---|---|
| MX | your domain | mail.tayon.app, priority 10 |
| TXT (SPF) | your domain | v=spf1 include:spf.tayon.app ~all |
| TXT (DKIM) | tayon._domainkey.yourdomain.com |
the DKIM key shown on screen |
| TXT (DMARC) | _dmarc.yourdomain.com |
v=DMARC1; p=quarantine; rua=mailto:dmarc@yourdomain.com |
Each one has a copy button. Use it rather than retyping — a single wrong character in the DKIM key is enough to fail verification.
A new mailbox starts at Pending Verification, with a Verify DKIM button. The DKIM record is what flips it to Active. Verify DKIM checks straight away, and Tayon also re-checks on its own every few minutes for the first two weeks, so a mailbox can turn Active without you coming back. If you cannot find the button, verification has already succeeded.
The other three records are not part of that check, but they matter for delivery. Add all four.
DNS changes can take up to 48 hours to reach every server, so if verification fails right after you save the records, wait and try again.
#Two different sending limits
This catches people out, because the two numbers are not the same thing.
- App Limits cover what Tayon sends for you — CRM messages, automations and AI agents. This is the pair shown in the list. Your plan sets them, and only an administrator can change them. The free plan allows 50 a day.
- Email client and webmail limits cover what you send by hand from webmail or a mail app. These are fixed at 100 an hour and 500 a day for every account.
The Email Sending Limits Information panel at the foot of the screen states both, so you never have to guess which number applies.
#Read and send your mail
The envelope icon on a mailbox’s row, Open webmail, opens that mailbox in a new browser tab, already signed in.
- Choose Open webmail on the mailbox’s row.
- The first time, Tayon asks you to confirm the mailbox password — We will only ask you this once. Enter it and choose Open webmail.
- From then on, the same click opens the mailbox straight away.
If the password is later changed somewhere Tayon cannot see — inside webmail itself, for example — the next click asks for the current one again. Changing it with Change Password on this screen keeps the link working.
Access Webmail, at the top of the screen, opens the ordinary sign-in page at
webmail.tayon.app instead.
To use a mail app instead, open DNS Settings and switch to the Email Client tab:
| Incoming Server | mail.tayon.app — IMAP port 993 (SSL), or POP3 port 995 (SSL) |
| Outgoing Server | mail.tayon.app — SMTP port 465 (SSL) or 587 (STARTTLS) |
| Username | your full email address |
| Password | the password you set when creating the account |
#The other actions
Connect to CRM links an existing mailbox to a team member after the fact — the same thing the checkbox does when you create one. Edit From Name changes the name recipients see. Change Password sets a new one — Tayon updates its own connection, but update any mail app you use. Refresh Storage re-reads the space used. Transfer Domain moves a domain and its mailboxes to another account you own; it and Delete appear only for account administrators.
#When it goes wrong
Still says Pending Verification. Check the host names first — the trailing domain problem above is the usual cause. Then confirm you published the DKIM host the panel shows for this domain. Then give it time; 48 hours is the outside case, but a few hours is common.
Verification passed but mail still bounces. The MX record is separate from
the three text records and is not covered by Verify DKIM. Confirm it points
at mail.tayon.app with priority 10.
Campaigns will not send from the address. Being hosted here is not the same as being a confirmed sender. See Choose the address your messages are sent from.
You cannot create another mailbox. Your plan sets how many you get; the free plan includes one. Check Payment History in your account menu, or see Plans and credits.
Updated: